Follow Me On Social Media!
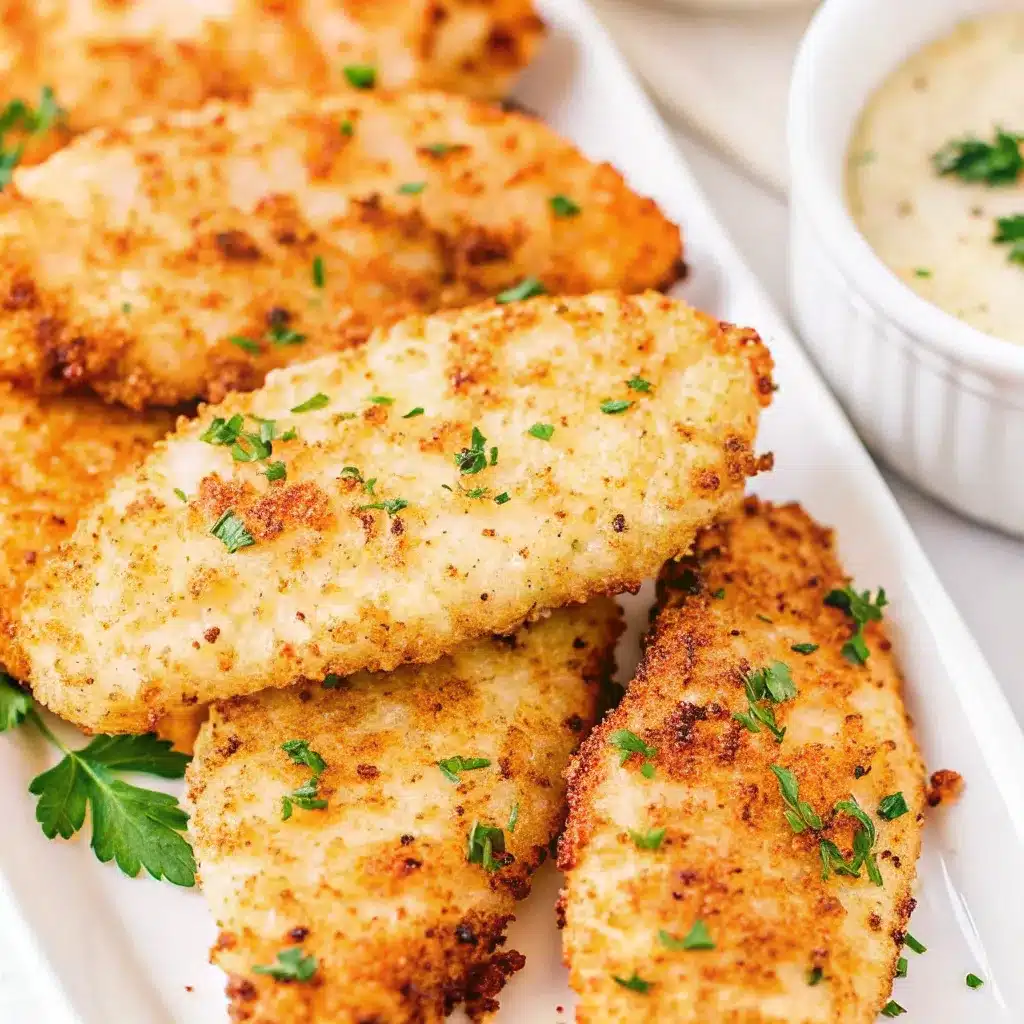
Air Fryer Ranch Chicken Recipe

So you’re telling me you can coat chicken in ranch seasoning, toss it in an air fryer, and have dinner ready in 20 minutes? Yeah, that’s exactly what I’m telling you. This Air Fryer Ranch Chicken isn’t some complicated recipe that requires a culinary degree or ingredients you can’t pronounce. It’s ranch chicken. Simple, delicious, and proof that sometimes the best recipes are the ones that don’t try too hard.
Table of Contents
Why This Air Fryer Ranch Chicken Recipe is Awesome
Let’s be real—ranch makes everything better. It’s basically a scientific fact at this point. But ranch chicken? That’s next-level genius. The seasoning creates this herb-packed, savory crust that’s crispy on the outside and juicy on the inside. It’s like someone took all the best parts of ranch dressing and turned them into actual food.
The air fryer does all the work while you sit back and pretend you’re a master chef. No babysitting a hot pan, no oil splatters on your favorite shirt, no heating up your kitchen like a sauna in July. Just set it, forget it (well, for 20 minutes), and enjoy the smell of victory wafting through your house.
And here’s the best part: this Air Fryer Ranch Chicken recipe is so versatile it’s basically the Swiss Army knife of chicken recipes. Meal prep? Check. Quick weeknight dinner? Absolutely. Something to impress your picky eater friends? You bet. It works for literally any occasion, including “I forgot to plan dinner and I’m starving.”
Plus, if you’ve got kids, they’ll actually eat this. Ranch is like the universal peace treaty of flavors—everybody loves it, nobody complains.
Ingredients You’ll Need
- 2 pounds boneless, skinless chicken breasts (or thighs if that’s your vibe)
- 1 packet ranch seasoning mix (store-bought is perfectly fine—no judgment here)
- 1/2 cup panko breadcrumbs (for that extra crunch factor)
- 1/4 cup grated Parmesan cheese (optional but highly recommended)
- 1 teaspoon garlic powder (because more garlic is always the answer)
- 1/2 teaspoon paprika (adds color and a tiny bit of smoky flavor)
- 2 tablespoons olive oil or melted butter (your choice, both work great)
- Salt and pepper (just a pinch)
- Cooking spray (for that golden finish)
Step-by-Step Instructions
1. Prep your chicken situation. Pat those chicken breasts dry with paper towels—seriously, don’t skip this step. If your chicken breasts are massive (like weirdly huge), pound them to an even thickness or slice them in half horizontally. We’re aiming for pieces that are about 3/4 to 1 inch thick so they cook evenly.
2. Make your coating mixture. In a medium bowl, mix together the ranch seasoning, panko breadcrumbs, Parmesan cheese (if using), garlic powder, and paprika. Give it a good stir until everything’s combined. This is your flavor bomb right here.
3. Oil up that chicken. Brush or drizzle olive oil (or melted butter) all over your chicken pieces. This helps the ranch coating stick and creates that crispy exterior we’re after. Don’t be shy—make sure every piece gets some love.
4. Coat like you mean it. Press each chicken piece into your ranch mixture, coating all sides generously. Really press it in there—you want that coating to cling to the chicken like it’s holding on for dear life. The more coating, the more flavor and crunch.
5. Preheat is not optional. Set your air fryer to 375°F and let it preheat for 3-4 minutes. I know preheating seems like an unnecessary extra step, but it makes a real difference in getting that perfect crispy texture.
6. Arrange and spray. Place your coated chicken in the air fryer basket in a single layer—no stacking or overlapping. Give the tops a light spray with cooking spray. This is what helps achieve that restaurant-quality golden crust.
7. Air fry to perfection. Cook for 10 minutes, then flip each piece and spray the other side. Cook for another 8-12 minutes depending on thickness. You’re looking for an internal temperature of 165°F and a golden-brown crust that makes your mouth water. Total time is usually 18-22 minutes.
8. Rest before you devour. Let the chicken rest for about 5 minutes after cooking. I know it’s tempting to dive in immediately, but this resting time lets the juices redistribute so every bite is juicy and delicious.

Common Mistakes to Avoid
Using wet chicken. I’m going to sound like a broken record here, but dry your chicken. Wet chicken + coating = a sad, soggy mess that falls off. Two seconds with a paper towel saves your entire meal.
Forgetting to oil the chicken first. The oil isn’t just for flavor—it’s the glue that holds your coating on. Skip it and you’ll end up with naked chicken and a pile of seasoning at the bottom of your air fryer. Not cute.
Cooking straight from the fridge. Let your chicken sit at room temperature for about 10-15 minutes before cooking. Cold chicken cooks unevenly and takes longer, which means dried-out edges and potentially undercooked centers.
Not flipping halfway through. Both sides deserve equal crispy treatment. Set a timer so you don’t forget to flip—it makes a huge difference in texture and color.
Cutting into it too soon. I get it, you’re hungry. But slicing into that chicken immediately means all the juices run out onto your cutting board instead of staying in the meat. Just wait the 5 minutes. Scroll through your phone or something.
Alternatives & Substitutions
No ranch packet? Make your own by mixing together dried dill, parsley, garlic powder, onion powder, salt, and pepper. It’s not exactly the same, but it’ll get you pretty close. Or honestly, just use Italian seasoning—it’s different but still delicious.
Want it gluten-free? Swap the panko for crushed gluten-free crackers, almond flour, or gluten-free breadcrumbs. The texture will be slightly different but still totally good.
Prefer chicken thighs? Go for it! They’re juicier and more forgiving if you accidentally overcook them. Just add 2-3 extra minutes to the cooking time since they’re usually thicker and fattier.
Make it spicy? Add some cayenne pepper or red pepper flakes to your coating mixture. Start with 1/4 teaspoon and work your way up if you’re brave.
Dairy-free version? Skip the Parmesan or use a dairy-free alternative. The cheese adds flavor but isn’t essential—the ranch seasoning does most of the heavy lifting anyway.

Final Thoughts
And there you have it—Air Fryer Ranch Chicken that’ll make you wonder why you ever ordered takeout. This recipe is basically foolproof, which means even if cooking isn’t your strong suit, you’re going to nail this one.
The beauty of this Air Fryer Ranch Chicken recipe is its simplicity. You’re not juggling a million ingredients or complicated techniques. It’s just good chicken with great flavor, cooked in a way that doesn’t make you want to give up on life.
Serve it with literally anything—roasted veggies, a salad, mac and cheese, rice, or just eat it straight with your hands over the sink like a gremlin. No judgment here. It’s your kitchen, your rules.
Now go make some ranch chicken and feel good about yourself. You’ve earned this easy win.
FAQ (Frequently Asked Questions)
Can I use homemade ranch seasoning instead of a packet? Absolutely! Mix 2 tablespoons dried parsley, 1 tablespoon dried dill, 2 teaspoons garlic powder, 2 teaspoons onion powder, 1 teaspoon dried chives, 1/2 teaspoon salt, and 1/2 teaspoon pepper. This makes roughly one packet’s worth. Store any extra in an airtight container and feel fancy about your homemade seasoning skills.
How do I store and reheat leftovers? Store cooked chicken in an airtight container in the fridge for up to 4 days. To reheat, pop it back in the air fryer at 350°F for 3-5 minutes. This keeps it crispy instead of turning it into sad, rubbery chicken. Microwaving works in a pinch, but you’ll lose that beautiful crunch.
Can I freeze this chicken? Yep! Freeze cooked chicken in a freezer-safe container for up to 3 months. Thaw in the fridge overnight, then reheat in the air fryer. You can also freeze uncooked breaded chicken—just cook it straight from frozen, adding about 5-7 extra minutes to the cooking time.
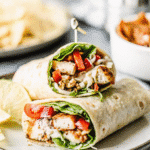
What’s the best way to serve ranch chicken? Honestly, it goes with everything. Slice it over a Caesar salad, serve it alongside roasted potatoes and green beans, make chicken ranch wraps, or throw it on top of pasta with some alfredo sauce. My personal favorite? Slice it up and put it in a wrap with lettuce, tomato, cheese, and extra ranch dressing. It’s basically a party in your mouth.

Air Fryer Ranch Chicken Recipe
Course: Air Fryer, Main Course, DinnerCuisine: AmericanDifficulty: EasyServings
4
servingsPrep time
9
minutesCooking time
20
minutesCalories
338
kcalTotal time
30
minutesIngredients
2 pounds boneless, skinless chicken breasts
1 packet ranch seasoning mix
1/2 cup panko breadcrumbs
1/4 cup grated Parmesan cheese (optional)
1 teaspoon garlic powder
1/2 teaspoon paprika
1/2 teaspoon paprika
Salt and pepper to taste
Cooking spray
Directions
- Pat chicken breasts dry with paper towels. If chicken breasts are thicker than 1 inch, pound to even thickness or slice horizontally.
- In a medium bowl, combine ranch seasoning mix, panko breadcrumbs, Parmesan cheese, garlic powder, and paprika. Mix well.
- Brush or drizzle olive oil or melted butter all over chicken pieces, coating evenly.
- Press each chicken piece into ranch mixture, coating all sides generously and pressing firmly so coating adheres.
- Preheat air fryer to 375°F for 3-4 minutes.
- Place coated chicken in air fryer basket in a single layer without overlapping. Spray tops lightly with cooking spray.
- Cook for 10 minutes, flip each piece and spray the other side. Cook for another 8-12 minutes until internal temperature reaches 165°F and coating is golden brown (total 18-22 minutes depending on thickness).
- Let chicken rest for 5 minutes before serving.
Notes
- Brush chicken with oil or butter first—this acts as the glue that holds the ranch coating on and creates a crispy, golden crust.
- Let chicken sit at room temperature for 10-15 minutes before cooking for more even cooking and juicier results.
- Don’t skip the resting time after cooking—5 minutes allows juices to redistribute throughout the meat for maximum juiciness.