Follow Me On Social Media!
Oreo Dump Cake Recipe
If you’ve never made a dump cake before, prepare to have your mind blown by the easiest dessert you’ll ever make. This Oreo Dump Cake Recipe is literally what it sounds like: you dump stuff in a pan, bake it, and somehow end up with a ridiculously delicious dessert that tastes like you actually tried. It’s the kind of recipe that makes you feel like you’re cheating at baking, but nobody needs to know that.
Table of Contents
Why This Oreo Dump Cake Recipe is Awesome
Here’s the deal: there’s no mixing involved. None. Zero. Zilch. You literally just layer ingredients in a pan and let the oven do all the work. It’s perfect for those times when you need dessert but would rather watch paint dry than deal with measuring cups and stand mixers.
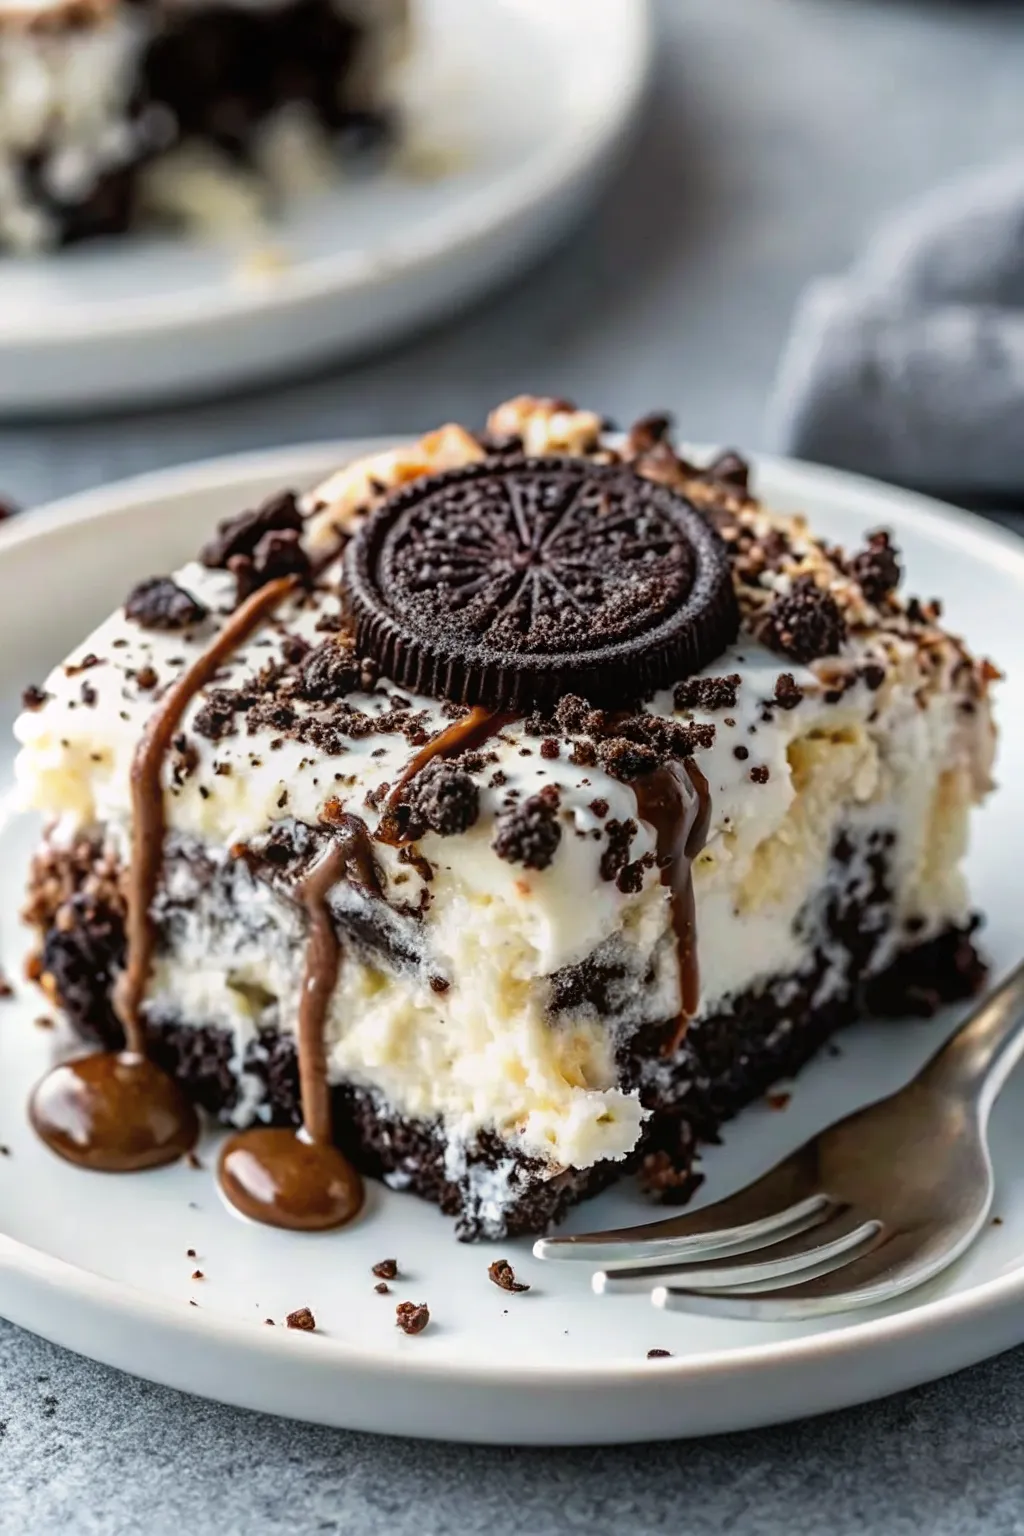
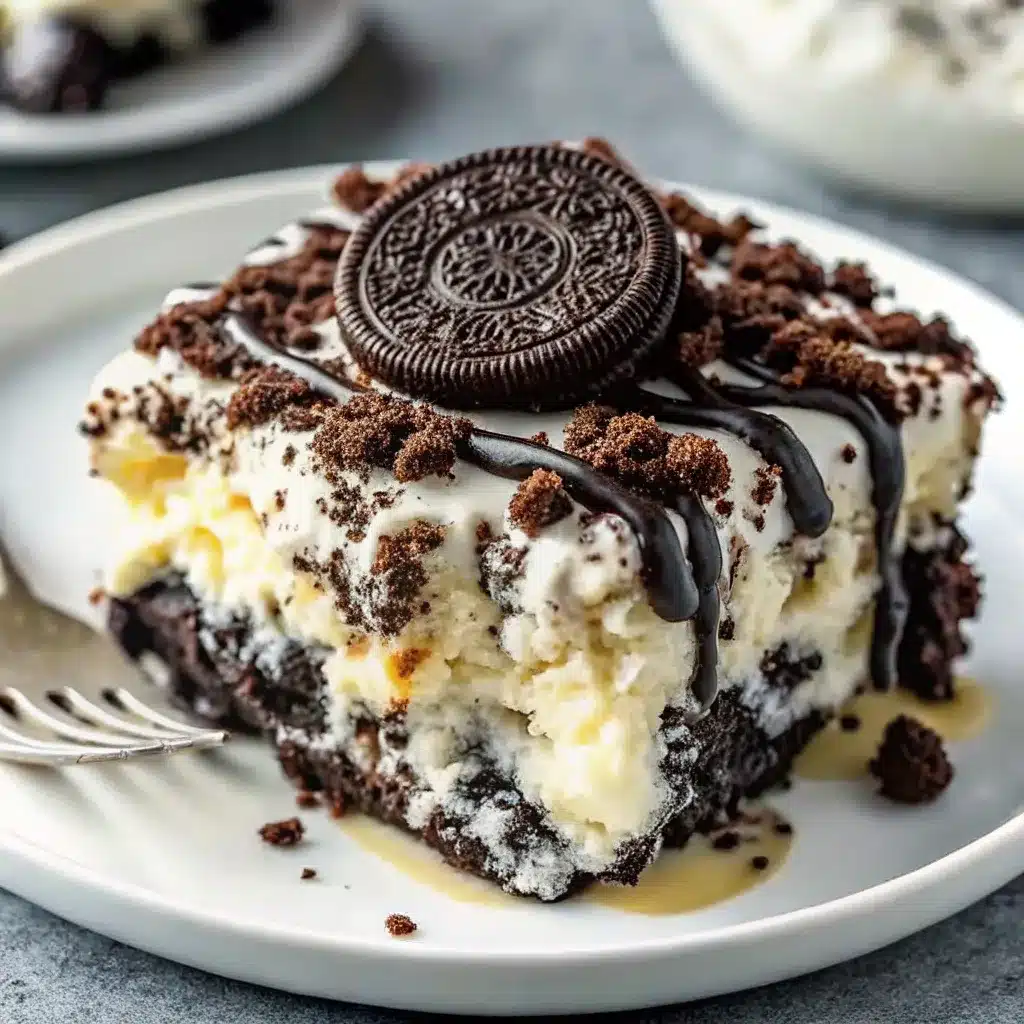
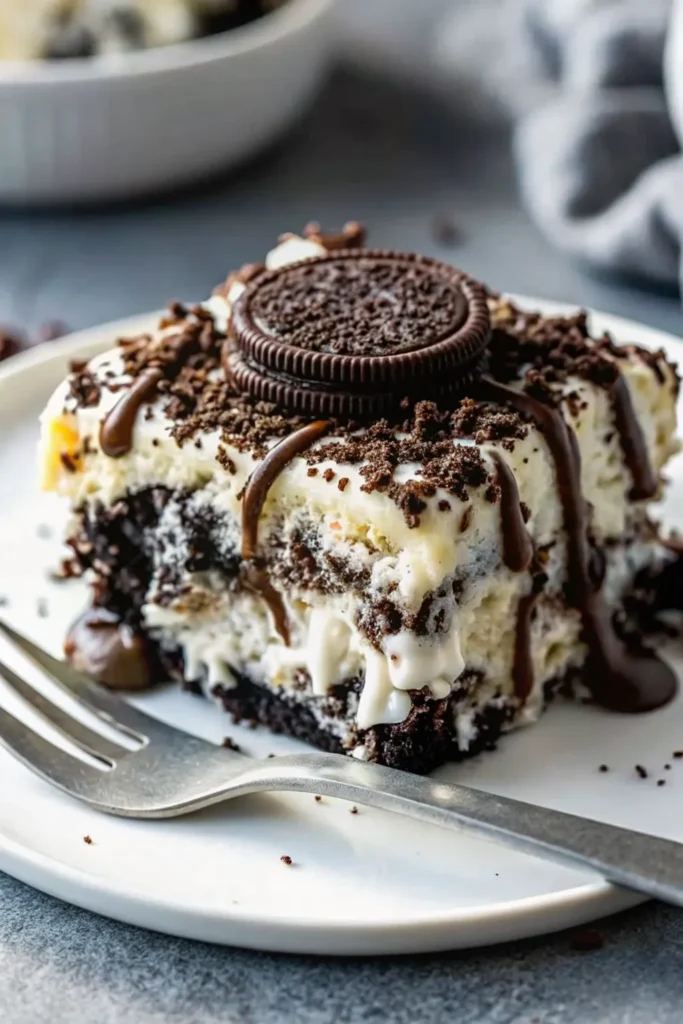
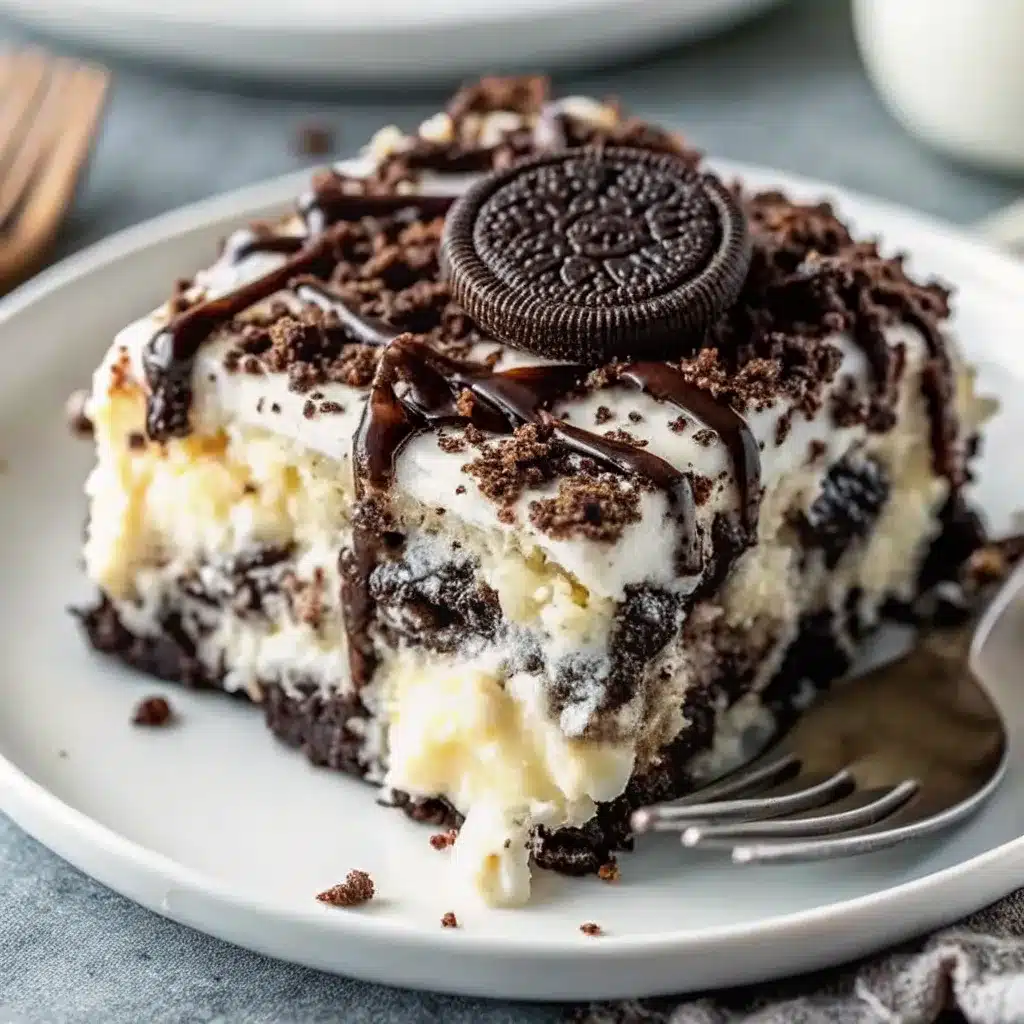
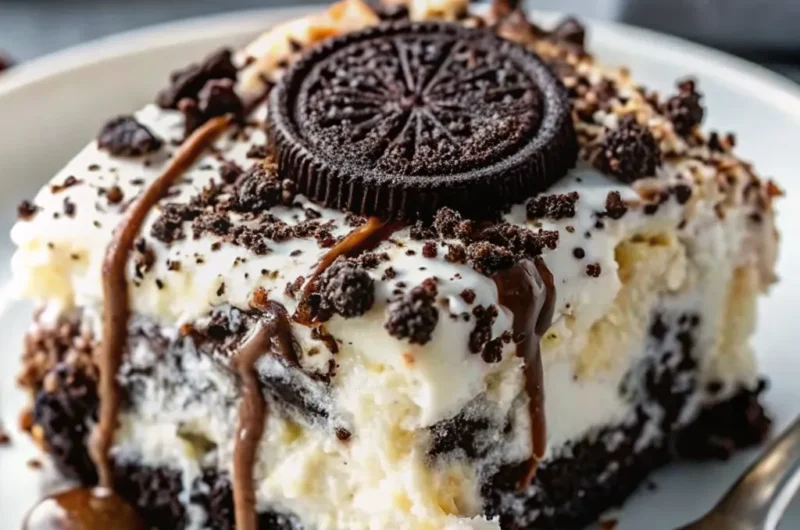
The texture is where this thing really shines. You get a gooey, fudgy bottom layer that’s almost pudding-like, topped with chunks of Oreos that get all crispy and caramelized. The cake mix creates this weird magic crust situation on top that’s somehow both crunchy and tender at the same time.
It serves a crowd, which means you can bring this to a potluck and watch people lose their minds when you tell them how easy it was. Plus, it’s nearly impossible to mess up. If you can open packages and turn on an oven, congratulations—you’re now a baker.
The best part? You probably already have most of these ingredients in your pantry, assuming you’re the kind of person who keeps Oreos around. And if you’re not, well, what are you even doing with your life?
Ingredients You’ll Need
The main players:
- 1 package (15.25 oz) chocolate cake mix (just the mix, don’t follow the box instructions)
- 1 package (14.3 oz) Oreo cookies (about 36 cookies, regular or Double Stuf)
- 1/2 cup (1 stick) unsalted butter, melted
- 1 cup semi-sweet chocolate chips
- 3/4 cup milk (whole milk works best, but use what you’ve got)
Optional but highly recommended:
- Vanilla ice cream for serving (because hot cake + cold ice cream = heaven)
- Whipped cream (if you’re feeling fancy)
- Extra crushed Oreos for topping (because more Oreos is always the answer)
Step-by-Step Instructions
1. Preheat and prep. Set your oven to 350°F and grab a 9×13-inch baking dish. You can grease it if you want, but honestly, with all the butter in this thing, it’s not super necessary. I do it anyway because I’m paranoid.
2. Crush those Oreos. Break up the Oreos into chunks—some big, some small. You want variety here. Don’t pulverize them into dust, or you’ll lose that chunky texture that makes this dessert so good. I usually just break them by hand into quarters or use a zip-top bag and a rolling pin for about 10 seconds.
3. Layer the bottom. Spread the crushed Oreos evenly across the bottom of your baking dish. This is your foundation, so make sure they cover the whole pan.
4. Add the cake mix. Sprinkle the dry cake mix evenly over the Oreos. Do not mix anything. I repeat: do not mix. Just let it sit there like a delicious blanket of potential.
5. Pour the milk. Drizzle the milk evenly over the cake mix. It might seem weird, but trust the process. The milk helps create that gooey bottom layer while the top gets crispy.
6. Sprinkle the chocolate chips. Scatter the chocolate chips all over the top. They’ll melt into pockets of chocolatey goodness, and some will get all crispy on top. It’s a win-win situation.
7. Drizzle the butter. Pour the melted butter evenly over the entire thing, making sure to cover as much surface area as possible. The butter is crucial—it’s what makes the top layer turn into that golden, crispy crust.
8. Bake it up. Pop it in the oven for 40-45 minutes. You’ll know it’s done when the top is golden brown and you can see it bubbling around the edges. The middle might look slightly jiggly, but that’s okay—it’ll set as it cools.
9. Cool slightly before serving. Let it rest for about 10-15 minutes. This gives everything time to settle and makes it less likely you’ll burn your mouth off. Serve warm with ice cream because you’re not a monster.
Common Mistakes to Avoid
Mixing the ingredients. I know it seems wrong to just dump everything in without stirring, but that’s literally the whole point. Mixing will ruin the texture layers that make dump cake special. Resist the urge to be helpful.
Using diet or low-fat milk. This isn’t the time to be health-conscious. Whole milk creates a better texture and richer flavor. If you only have 2%, fine, but skim milk will give you sadness.
Cutting into it too soon. I get it, you’re excited. But if you cut into this immediately after taking it out of the oven, it’ll be a molten lava mess. Give it at least 10 minutes to chill out and set up.
Forgetting to cover the edges with butter. Those dry spots on the edges will stay dry and cakey (and not in a good way). Make sure that butter reaches everywhere.
Alternatives & Substitutions
Different Oreo flavors: Go wild here. Golden Oreos, Mint Oreos, Peanut Butter Oreos—they all work. Birthday Cake Oreos turn this into a party in your mouth. IMO, the variety packs are perfect for this because you get multiple flavors in one cake.
Cake mix options: Yellow cake mix works if you want a less intensely chocolate situation. White cake mix with Golden Oreos is also surprisingly good. Devil’s food cake mix will make it extra fudgy.
Dairy alternatives: Almond milk or oat milk work fine as substitutes. For the butter, you can use coconut oil or vegan butter if needed, though the flavor will be slightly different.
Mix-ins: Throw in some peanut butter chips, white chocolate chips, or even crushed pretzels for a sweet-and-salty vibe. Caramel sauce drizzled on top before baking is also dangerously good.
Final Thoughts
Look, if you can’t make this Oreo Dump Cake Recipe successfully, I don’t know what to tell you. It’s basically foolproof, ridiculously delicious, and requires almost zero effort. It’s the dessert equivalent of finding money in your pocket—unexpectedly awesome and makes everything better.
Make this for your next gathering, keep the Oreo Dump Cake Recipe recipe to yourself, and bask in the compliments. Or share the recipe and blow everyone’s minds with how easy it is. Either way, you win. Now go preheat that oven and get dumping.
FAQ (Frequently Asked Questions)
Can I make this without a cake mix? Technically yes, but then it’s not really a dump cake anymore, is it? You’d need to create your own dry cake mix substitute with flour, sugar, cocoa powder, baking powder, and salt. Honestly, just buy the box mix—this is supposed to be easy.
How do I store leftovers? Cover it tightly with foil or plastic wrap and keep it in the fridge for up to 4 days. Reheat individual portions in the microwave for 20-30 seconds. It’s actually pretty great cold too, if you’re the kind of person who eats cake straight from the fridge at midnight. No judgment.
Can I make this ahead of time? You can assemble everything in the pan, cover it, and refrigerate for up to 24 hours before baking. Just add about 5 extra minutes to the baking time since it’ll be cold. Don’t bake it ahead though—it’s best served fresh and warm.
What if I don’t have a 9×13 pan? Use an 8×8 or 9×9 pan, but you’ll have a thicker cake that needs about 10 extra minutes of baking time. Watch it closely. You could also use a cast-iron skillet if you’re feeling rustic and want to serve it straight from the pan like some kind of dessert hero.
Oreo Dump Cake Recipe
Course: DessertCuisine: AmericanDifficulty: EasyServings
12
servingsPrep time
10
minutesCooking time
45
minutesCalories
380
kcalTotal time
55
minutesIngredients
- The main players:
1 package (15.25 oz) chocolate cake mix
1 package (14.3 oz) Oreo cookies (about 36 cookies)
1/2 cup (1 stick) unsalted butter, melted
1 cup semi-sweet chocolate chips
3/4 cup whole milk
- Optional:
Vanilla ice cream for serving
Whipped cream
Extra crushed Oreos for topping
Directions
- Preheat oven to 350°F. Lightly grease a 9×13-inch baking dish.
- Break Oreos into chunks (quarters work well). Spread evenly across the bottom of the baking dish.
- Sprinkle dry cake mix evenly over the Oreos. Do not mix or stir.
- Drizzle milk evenly over the cake mix layer.
- Scatter chocolate chips evenly over the top.
- Pour melted butter evenly over the entire surface, making sure to cover all areas including edges.
- Bake for 40-45 minutes until the top is golden brown and bubbling around the edges.
- Let cool for 10-15 minutes before serving. Serve warm with vanilla ice cream.
Notes
- Do not mix the layers – The magic of dump cake happens when ingredients stay separate and create distinct texture layers during baking.
- Use whole milk for best results – Low-fat or skim milk won’t create the same gooey, pudding-like bottom layer that makes this dessert special.
- Cover edges with butter completely – Any dry spots without butter will stay dry and cakey, so make sure the melted butter reaches every corner of the pan.